Category: Gear

Nikkor 35mm F2 AF D…

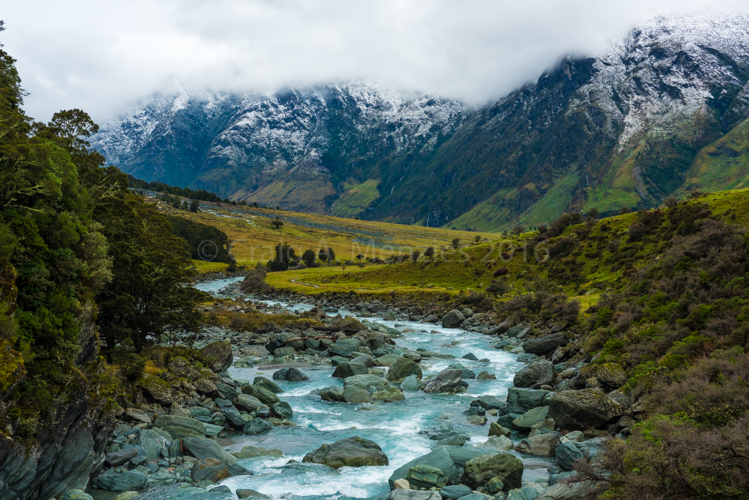
I would say that 50% of the time I wanted to take a landscape shot in NZ on my recent trip to the South Island, I wished I’d had a 35mm lens to shoot the scene rather than the 50mm or the 14 – 24mm lenses I had with me at the time. Not because they weren’t great lenses, simply because I felt that the 35mm was a better choice for what I was trying to capture. I made do, and I did come back with some fantastic shots. But I decided that such thoughts had shown me a gap in my lens range that needed to be addressed.

Hence yesterday I took delivery of a Nikkor 35mm F2 AF D. There is a G version of the lens, but it’s considerably more bulky for the slight increase in sharpness and image quality. Not enough in my opinion to warrant the extra expense when size and weight is a far more critical element to me for this choice. Yes it’s an older lens design, but still relevant and reviews very well. Simplicity is often the best answer. There are just some lenses that don’t really need that much improvement, and sometimes that improvement comes at a cost that discounts some or all of the benefits of the previous design.

Like my Nikkor 50mm F1.4 AF D I need something that is easy to slip in the pocket, doesn’t take up much room, and prefer it to use the same size filters (52mm) as the 50mm F1.4 or the 50mm 1.8 lenses.

I’ve yet to give it a good test yet, but hopefully over the next couple of evenings I’ll take it for a walk and try it out. Otherwise I guess it will be getting tested on the weekend.


Back from the Land of the Long White Cloud…

I have been back a week now, and starting to get some of the stock organised from the New Zealand (South Island) Junket. I had a fantastic time, and managed to improve my skill set immensely as well as come back with some beautiful memories and shots. I’d really love to get back there soon, and possibly move there in the future. It seems to be one of the last paradises left.

I was somewhat disappointed from the wildlife point of view, but I guess that’s because I aimed to see so much that I didn’t allow myself the luxury of the time necessary to just sit and wait for the local fauna to begin to ignore me and get on with normal activities. Somehow I lost sight of that in the euphoria of making the trip happen. Still, I met some great people, managed to generate a bit of free publicity for my business internationally, hopefully it’s generating further interest when each of those I chatted to gets home themselves. Best of all I enjoyed a magnificent country with a population working quite hard to live in an environmentally sustainable manner, with an environmental, economic and social focus. Fantastic to see in action.

Overall, I’d say there was not much I could have done to improve this trip being my first overseas working photography trip. As I said, unintentionally I think I prioritised scenery and flora over wildlife, but then on reflection I’m not sure in this instance I could have done it any other way now. I would need to have that focus purely for the trip I think as so much of the wildlife is birds, which requires quite a bit of waiting at times.

One of the other glaring gaps in my planning for the trip was the lack of a 35mm Lens. I can see that because I wasn’t originally planning to be doing so much landscape when I was organising the trip originally. Certainly I was planning on seeing the landscape, but hadn’t consciously realised I’d be shooting that above everything else. Still lessons learned, and still plenty of stock. And certainly I could do with more landscape stock. Still on landscape, I was very happy with my filter work (see featured shot above). I believe I’ve improved that significantly on the trip, and also found that I can achieve similar results with my AF-S NIKKOR 14-24MM F/2.8G ED (1.7X) without a filter with a bit of patience. Great considering a special adapter is required to use filters on such a lens. And it gives me great results such as this one below.

Barrow Downs 2


Although both the images in this post required a tripod, I did do far more handheld over the course of the trip, and also felt that my ability to shoot handheld in difficult circumstances improved significantly as too did my ingenuity for when I didn’t have a tripod but needed some extra stability.


The Essence of Change…

Well I’m in my last Seven Days here in New Zealand, and feeling like I’m running to of time. I’ve actually managed to achieve the bulk of what was on my list to get done while I was over here this time, but I have missed some of the Optionals, and one of my Non-Optionals. Stewart Island will have to wait for another time I’m afraid. Weather wasn’t that good for the day that I was going to try and do it, so I decided the money could be spent elsewhere this time.

Until I get back, the featured aperitif


Weathering the Storm…

I took the opportunity of the first decent storm in months to get out and take a few shots of lightning. It’s my first attempt at getting out and shooting in a storm, in particular chasing the Lightning Shots. Also given it was midnight, things were a bit smash and grab as far as gear and location. I grabbed the D600 with the 50mm F1.4 & the Nikon 14-24mm F2.8. I also grabbed a hand release and my MIOPS Trigger hoping I might get a chance to use it for the first time with Lightning too.

So off I drove to the closest vantage point I thought was high but with plenty of other choices for Lightning to strike other than myself! As it turns out, where I parked on the side of the road happened to be unfortunate orientation: over the course of the storm most of the lightning was to the sides of me. However I managed to get 1 out of the 30 shots that worked for me. But to be fair it was my first attempt at this subject matter.

I thought I was stuck not being able to use my MIOPS as I thought I’d not bought the extra cable for the connection for the D600 (it’s different than the D810). As it turned out later when I got back home I realised that the remote release I had been using had a detachable cord with the right connection! Anyway, lesson learned for next time: spend more time with some gear in relaxed conditions. Still shooting in Bulb mode, with the remote release I felt I started to have a good feel for the right way to shoot it near the end of 30 odd shots. I’m looking forward to the next Storm when I will be more prepared.


Juxtaposition of Space…

I’ve reshuffled things about the house to come up with a dedicated studio area for the time being until I can come up with a better solution.

The idea is to separate me from the computer and the editing software, and go back to experimenting with the equipment and up-skilling myself on that which I use less often. Things such as the miops trigger, a couple of my other remote controls for interval shooting etc. It’s annoying sometimes finding you’ve forgotten how to use something or can’t remember how to access that feature quickly. The only thing I know to fix that, is practise with it. It also gives me an area to mess with prints & frames, and have all my equipment in a single location.

At this stage I can fit a reasonable size backdrop in there, albeit only a short shooting distance, which excludes some lenses for portrait work unless it’s just the upper shoulders & head.

There’s also some good light that would allow some studio macro work for some small set shooting. I like to shoot my Flora & Fauna macro work outside in the natural environment, but there are times I want to experiment with something that’s clearly NOT alive, and the “authenticity” is not a factor. Also some of the Focus stacking can be done inside which makes it far easier to control some environmental factors.

Now having some alternative lighting options should give me the ability to make better use of more time!


In the Prime…

Very close to home the last couple of weeks, but did have a chance to experiment with the Nikkor 50mm F1.4 D quite a bit. It’s a wonderful little lens and still does remarkably well on the D810. It’s sharper than the Nikkor 50mm F1.8 D but I wouldn’t say hugely so considering the few hundred dollars difference in price. Value for money, the Nikkor 50mm F1.8 D at just over a $100 (AU) is probably hands down winner of all the Nikkor lenses. It’s a great little lens that will go in your pocket easily and takes great shots. It’s just a simple thing made well. It’s not perfect, but for the price it’s unjustified to complain. If you have the budget the 1.4 gives you better shots, but those hundreds extra could go towards something else if you have the Nikkor 50mm F1.8 D. that said, Mina (featured image) was shot with the Nikkor 50mm F1.4 D. But one of my favourite shots of Tigga was with the Nikkor 50mm F1.8 D as was the little tweeter underneath. Also the self portrait I use for my business cards was shot with the Nikkor 50mm F1.8 D. It’s easy to see why the 50mm prime receives such reverence.

Mina Enjoying a Brush


This bears closer inspection

While visiting Andrew the other weekend I happened to be graced with Mina modelling herself on the kitchen table when I arrived. I was allowed a few shots before she decided that she’d done enough work, and wandered off to sleep on the window sill. Along with practising with the Nikkor 50mm F1.4 D I’ve begun to experiment with Lens Filters. I’m really appreciating the benefits such accessories bring to my photography. Of course these aren’t the only experiments going on at the moment, but more on that in a later post.


“Tying” It All Together…

I’ve finally worked out the trick to getting the Stackshot to work as expected with the Camranger. I was concerned that somehow I’d misread of misinterpreted the capability of the Camranger to work with the Stackshot with complete compatibility. I’d been having trouble with trying to discern how to enable the Stackshot to use it’s stepping so I could break out of using the autofocus Focus Stacking function available within the Camranger software and use the Stackshot to it’s full effect. I had been using the Stackshot via its own controller, and getting the desired functionality, but that wasn’t the way I necessarily wanted to be using it. I was wondering if I’d missed an additional component that I would need to purchase. Yet my original research indicated it would work with the equipment I already had, that being the Camranger & the Camranger Pan & Tilt Head.

It appears I’ve missed (up until now) connecting up the Stackshot Controller to the Pan & Tilt Control. Once I realised this, it’s obvious that there was no way for the Stackshot Controller to be talking to the Camranger software on the iPad without such a connection but the Documentation hadn’t really made that connection obvious. Once I’d pondered this little issue of communication for a period of time with a clear head, I began to question the use of the empty port on the Pan & Tilt Control. Once connecting up via a relatively short USB to Mini-USB cable the Stackshot Controller & the Camranger Pan & Tilt Control everything fell into place.

Now the iPad Camranger Software showed a new option available, and I could configure the Stackshot steps, repetitions and distance. This is fantastic coupling of technology and a boon to Macro and Close-up photography.


Using the Camranger

I have to say that I looked at this device a while ago when I realised that Nikon just wasn’t going to put wireless on a lot of it’s cameras for a while yet. It also offered way more possibilities than the Eye-Fi devices did, even though they were handy. I still use them on occasion, for a quick transmission of photos to show someone. The Nikon Wifi units such as the WU-1B or WU-1A themselves seem of little use to me in their current incarnations, and better units cost significantly more but with no better functionality until you reach the $1000 price range.

The best feature for me is of course the iPad application. It allows me to stop cramping myself into some ridiculously tight spots.


Using the Stackshot

This has been a boon to my Macro Shooting. It allows for absolutely startling Focus Stacking. Given that manual focus is the best option for macro shooting most of the time and even if it wasn’t necessarily the best way to go, I’d rather not use the auto focus with my Nikon 200mm F4 Micro. My one criticism of the lens is that the toggle for the manual / autofocus is fragile and the only real plastic on the lens. Others have commented that over time this is a potential failure point. I’d prefer to not use this particular component of the lens at all. I like to leave it set on Manual and not change it at all. There’s really no need given that the Lens was bought specifically because it’s the best Macro Lens Nikon offer at this stage short of Microscopic Technology.


Using the Fujifilm X-T1

General

After having the X-T1 for a few weeks now I’m starting to get the hang of it. I’m still trying to work out one peculiarity of the way it operates when it comes to the shutter speed, but outside of that I’m very happy with it for a *pick up and run, take anywhere* camera.

One of the many features that I appreciate about the X-T1 is the viewfinder. That said, I’m taking a little bit of time to get used to the appearance inside the viewfinder. Being Electronic, it’s got that *digital* appearance that a DSLR viewfinder doesn’t. Sort of like that difference between film vs digital when watching a movie with regard to the original recording medium.

I love the *feel* too. Weighty, comfortable, some dial controls so you can see what’s going on without having to look through the view finder.

Quirks

I suppose it takes a bit of getting used to after getting caught up with the digital camera what are you doing things. But going back to the control dials on the top yet still having control wheels on the front and rear would lead you to think that in manual you can just keep increasing or decreasing the settings at will. This however seems not to be the case.

The more I think about this the more since it makes. Clearly if you were expecting to be setting the shutter speed by the control dial on the top, you don’t really want the control wheel at the front or rear excessively adjusting it after you set it. Hence, the ability to only change the shutter speed by thirds of a stop. So you can increase the shutter speed for one third of a stop, or reduce shutter speed by up to 2/3 of a stop.

Software Compatibility

Interestingly there seems to be some difficulties with Major Software such as Lightroom & DXO.

Lightroom

Lightroom doens’t have profiles for the Lenses as such, apparently they use a built in profile that’s picked up by Lightroom and adjusts accordingly. So apparently it registers a built in profile. ++need to chase up why and how this works asap++ It seems to do it’s job. Whether this will change down the track remains to be seen.

DXO Suite
DXO currently doesn’t have any inbuilt support for these Fujifilm cameras. They cite technical reasons, that at this stage won’t be dealt with by DXO. Their slant seems to be that Fujifilm needs to come up with some solution in partnership with them.